ERGONOMICS
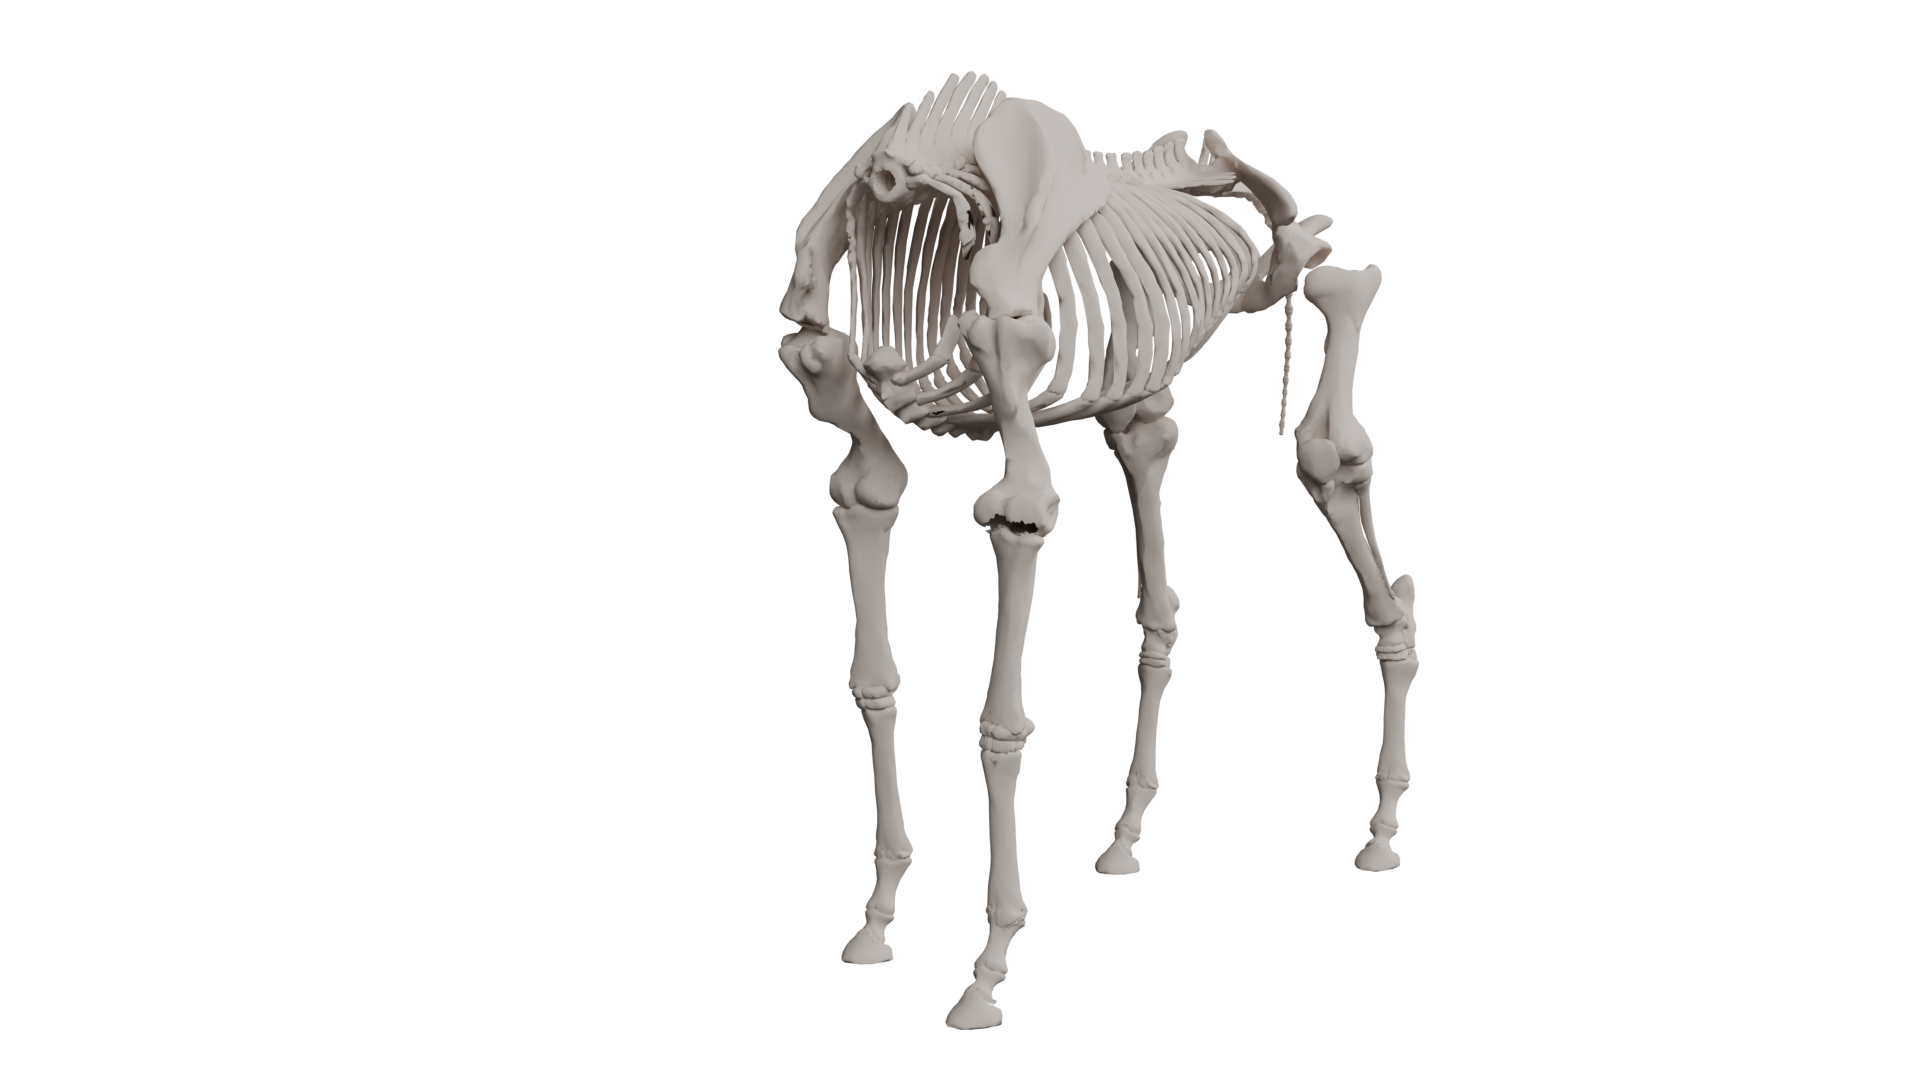
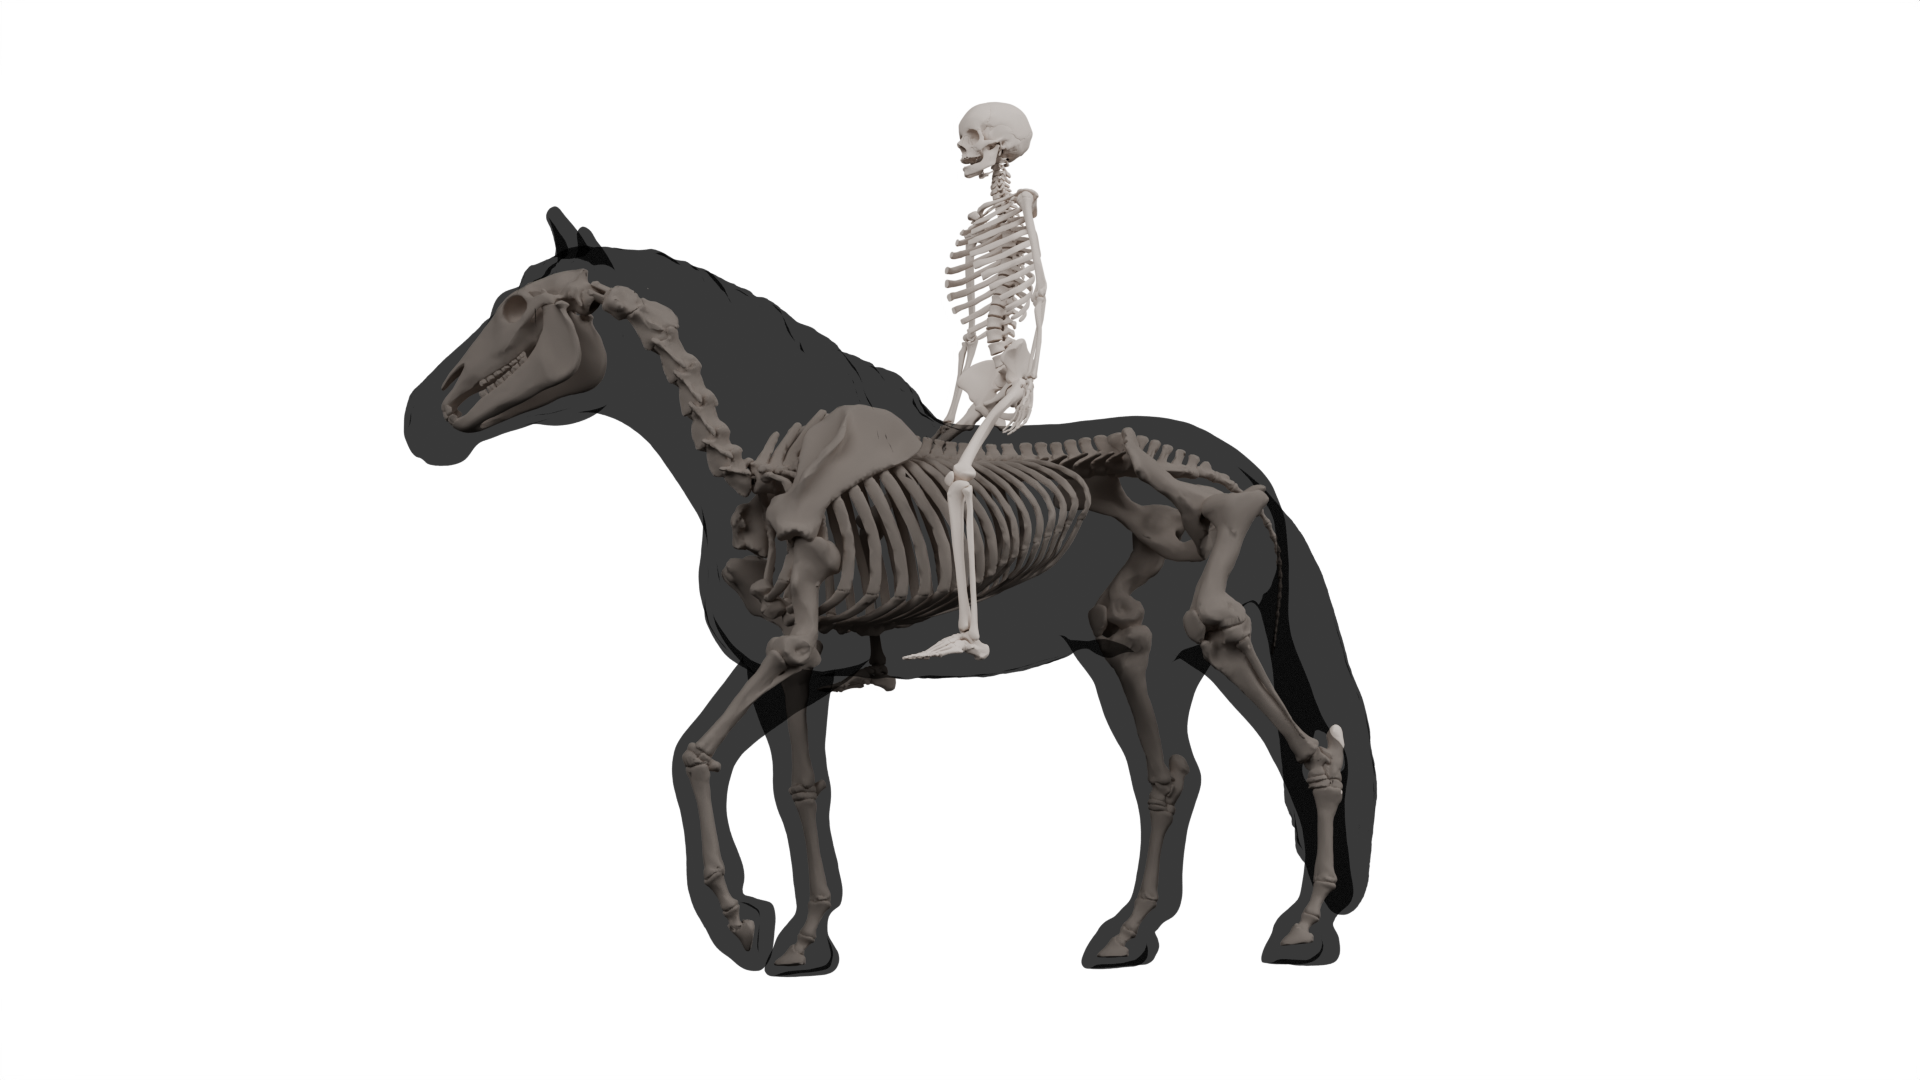
A key focus of the design is the ergonomics of the interface between rider and horse. When comparing the human skeleton with that of a horse, it quickly becomes clear that the rider’s weight places an unfavourable strain on the bone and muscle structures of the horse’s back. The weight is transferred to the back mainly via the buttocks and thighs, which rest flat against the horse’s back. The rider’s sit bones exert pressure on the horse’s long back muscles.
-
![]()
Monet Goode
GRÜNDERIN
Unsere Gründerin hat die Vision, etwas Bedeutungsvolles zu schaffen, und bringt die praktische Erfahrung mit, die großen Zusammenhänge zu sehen.
Sie gibt den Ton für alles an, was wir tun. -
![]()
Emmett Marsh
VERTRIEBSLEITER
Fokussiert, zugänglich und zielorientiert – unser Vertriebsleiter ist sehr darauf bedacht, starke Beziehungen aufzubauen. Er schafft es, Menschen umsichtig und transparent die richtigen Lösungen anzubieten. -
![]()
Eleanor Parks
MARKETINGDIREKTORIN
Unser kreative und gleichermaßen strategische Marketingdirektorin bringt frische Ideen in jede Kampagne ein. Sie verwandelt Erkenntnisse in Maßnahmen und verfasst Botschaften, die bei der richtigen Zielgruppe Anklang finden. -
![]()
Karl Holland
KUNDENSERVICE-MANAGER
Freundlich, aufmerksam und immer hilfsbereit sorgt unser Kundenservice-Manager dafür, dass jede Interaktion positiv verläuft. Er stellt sicher, dass die Kommunikation klar, zeitnah und menschlich bleibt.